Help Center
How to add custom fonts?
It’s possible to use your own hosted font files.
Install your own fonts
1. Use the child theme
The theme installer will create a child theme. Make sure you are using the child theme to continue.
Create a fonts folder in the child theme. You can use a FTP client or the file manager from your hosting Cpanel.
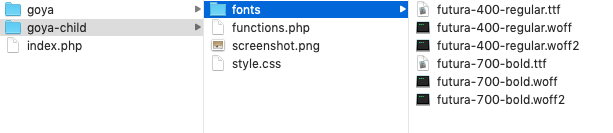
Upload your font files in the newly created fonts folder. The full path should be /wp-content/themes/goya-child/fonts/ and put your font files inside.
Your font must be ready to use for the web, the font file extensions are .ttf, .woff and .woff2
2. Edit style.css
Next, you’ll need to add some custom CSS to the child theme’s style.css file to reference this new font. The full path to the file is /wp-content/themes/goya-child/style.css
There’s a reference to local also. If the user happens to have the font already installed there’s no need to download it again.
Repeat the @font-face { } for each font variant (regular, bold, italic, etc).
@font-face {
font-family: 'futura';
src: local('futura'),
url('fonts/futura-400-regular.woff2') format('woff2'),
url('fonts/futura-400-regular.woff') format('woff'),
url('fonts/futura-400-regular.ttf') format('truetype');
font-weight: 400;
font-style: normal;
font-stretch: normal;
font-display: swap;
}
Code language: CSS (css)The example has woff2, woff and truetype. But you should use only the formats you have.
3. Edit functions.php
Add the following code to the child theme’s functions.php file. Never edit the parent theme files, all your custom PHP code must be added to the child theme only wp-content/themes/goya-child/functions.php
The following functions override the default font definitions. You can also adjust the number of Google fonts to show in the list.
Keep the same structure, just replace Futura Std with your own font and its weight variants.
This function is for the main font:
add_filter( 'goya_main_font_choices', 'goya_main_font_custom' );
function goya_main_font_custom() {
 return array(
  'fonts' => array(
   'google'  => array( 'popularity', 700 ),
   'families' => array(
    'custom' => array(
     'text'   => 'Goya Custom Fonts',
     'children' => array(
      array( 'id' => 'Futura', 'text' => 'Futura' ),
     ),
    ),
   ),
   'variants' => array(
    'Futura' => array( 'regular','italic','bold','bolditalic','300','300italic','500','500italic' ),
   ),
  ),
 );
}
Code language: PHP (php)
And this one for the secondary font
add_filter( 'goya_second_font_choices', 'goya_second_font_custom' );
function goya_second_font_custom() {
return array(
'fonts' => array(
'google' => array( 'popularity', 700 ),
'families' => array(
'custom' => array(
'text' => 'Goya Custom Fonts',
'children' => array(
array( 'id' => 'Gotham', 'text' => 'Gotham' ),
),
),
),
'variants' => array(
'Gotham' => array( 'regular','italic','bold','bolditalic','400','400italic','600','600italic','800','800italic' ),
),
),
);
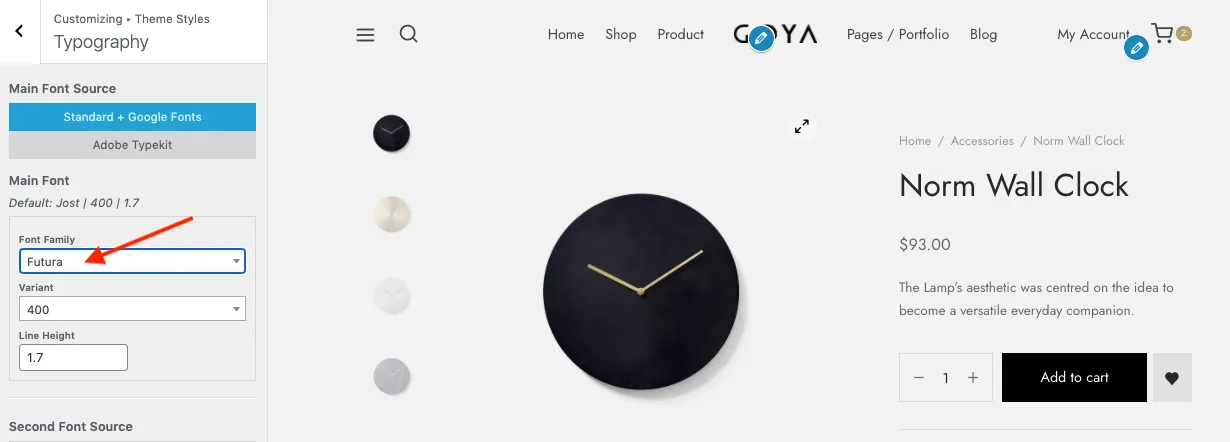
}Code language: PHP (php)4. Apply it in the customizer
Now, when you edit a typography element in the customizer you should see this new font as an option in the dropdown. If you’ve done everything correctly it will render.
Troubleshooting
A common problem occurs when the site is migrated to another server (dev to production).
Kirki caches the Google fonts locally. The fonts cache must be regenerated:
- First, empty the /wp-content/fonts/ directory.
- Then visit https://yoursite.com/?action=kirki-reset-cache
- and finally clear all caches from your cache plugin and also external caches if any (Varnish, Cloudflare)
That should fix the issue.